
How to make a product launch video with Claude from your real UI
November 5, 2026 · 12 min read
The launch film is the format that made people notice Claude could make video at all. Within days of Opus 5.5 shipping, X filled with fifteen second product films: a button that grows into a page, a chart that draws itself on the drop, a logo that squeezes into its own full stop. Every frame was code. No After Effects, no video model.
Most people who try it get the same result on the first attempt: a centered title on a gradient, everything fading in, a logo at the end. This tutorial is about closing the gap between that and the films people actually bookmarked. It is built from the methods that a handful of creators published in full, credited below, rewritten as one process you can follow for your own product.
The short version: the prompt is the smallest part. A reference, real assets, a written state list, a beat grid, springs and a review loop do most of the work.
What a code-drawn launch film is
Claude cannot output an MP4. What it writes is a web page with one function, usually called seek(t) or render(t), that paints exactly what the screen shows at time t. A headless browser calls that function once per frame, takes a screenshot, and ffmpeg joins the screenshots into a video. Because nothing runs on a timer, frame 412 can be drawn on its own, and the same input always gives the same frames.
That property is the whole reason the format works for product films. A title that lands two frames late is one number to change. A reviewer can ask for a still at 3.4 seconds and get exactly the frame the final video will contain. And the product UI itself, which is usually HTML and CSS anyway, can be rebuilt or screenshotted and animated without leaving the browser.
If you have not set up the basic pipeline yet, our guide on how to make videos with Claude Code covers the render loop and capture. This post assumes you have it and focuses on the craft of the launch film.
What the creators who published their method did
The most bookmarked method came from zero (@twoclipping), whose full course gives three complete prompts for UI morph and keynote style films. His claim is that this replaces work studios charge $5,000 to $15,000 for; he is also clear that his demos are not real product launches. His most useful observation is about taste: left alone, Claude reaches for dark, 3D looking films that still do not look high end, so he forces a 2D look with a warm white canvas, black UI, one accent and one clean font.
Raphael Aubry published the most honest account. He made more than ten films in three days, open sourced the harness as a Claude Code skill, and says plainly that "one prompt" is half true: his own SaaS launch video took five versions. His rule that every illustrative number on screen must say "Example data" is worth adopting on day one.
seeco (@seeconvm) and Movez (@0xMovez) both took the viral one-prompt videos apart and found the same thing: the best ones started from long production briefs, skills and real assets, not thirty words. Both relay Tony Dinh's TypingMind reel, where adding three lines (the product URL, a demand for real screenshots and logo, and "must have music") produced a film in under thirty minutes that he says would have cost him over $1,000 a year earlier. That figure is his claim.
Even the post that started the genre is instructive. Remotion's launch animation "created just by prompting" was made with nineteen small prompts, one change each, according to the prompt history its author published. That is the real rhythm of this work: direct, render, look, adjust.
Step 1: start from a reference, not a blank page
Pick a launch video whose rhythm you like: an Apple keynote segment, a Dribbble UI animation, a competitor's launch film. Sites that collect launch videos make this quick. You are not copying it. You are borrowing its grammar: how long shots last, how one scene becomes the next, how type enters, where the camera moves.
Ask Claude Code to study it before it writes any animation code. Extracting frames with ffmpeg and laying them on contact sheets lets the model see the whole film at once, which a single description never does.
Prompt shape: reference study
Reference: refs/launch.mp4
1. Extract 2 frames per second with ffmpeg onto contact sheets.
2. Break the film into beats: what happens, how each scene
   becomes the next, camera moves, colours (hex), type.
3. Write docs/style_guide.md and docs/shotlist.md for MY product
   ([name], [URL]) in that grammar.
4. Take the grammar, never the subjects, logos or copy.
5. Show me both files and wait before writing code.
The last line matters more than it looks. Every later stage gets cheaper if a human approves the plan while it is still text.
Step 2: real assets only
The fastest way to make a launch film look fake is to let the model draw your product from imagination. It will invent buttons with the wrong spacing and dashboards with the wrong data, and anyone who uses your product will feel it in a second. Have Claude open the live site with Playwright, take real screenshots at the resolution you need, collect the logo, colours and fonts, and list everything it found before it animates anything. If a screen is missing, it should stop and ask rather than draw a convincing fake.
The same rule applies to claims. If the film shows a number, it should be a real number you can defend, or it should be labelled as an example. Raphael Aubry's first draft listed nine integrations as native when only four were; one wrong logo spotted in the replies can undo the whole launch.
- Product screens: captured from the live app, cropped and animated, never redrawn.
- Brand: logo files, hex colours, the actual UI font, one accent.
- Proof: one metric or screenshot that backs the claim, sourced.
- Audio: a licensed track with a clear drop, plus real sound effects for clicks and whooshes.
Step 3: write a state list, not a vibe
"Zoom in, morph, add particles" is a list of activity. A launch film needs a list of what the viewer knows at each second. Seeco's version is a good default for fifteen to twenty seconds: a hook, the problem shown on screen, the product entering through a real interaction, one piece of proof, and a clean close with a readable call to action.
The films that looked most expensive share one structural idea, which twoclipping's prompts make explicit: one shape that never cuts. A pill becomes a button, the button becomes a loader, the loader becomes a check, the check becomes a card. Every state is the same element changing size, radius and colour, a cursor drives each change with a real click or drag, and the last frame matches the first so the clip loops.
A state list for a 16 second film at 120 BPM
0.0  logo squeezes into its full stop, the dot grows into a pill
1.0  pill becomes the CTA button, cursor arrives, click (beat)
2.0  button stretches into an email field, address types on
3.5  field shrinks into a loader, loader resolves to a check
5.0  check expands into the dashboard card (real screenshot)
7.0  chart draws itself, lands on the drop
9.0  cursor hovers, tooltip shows the one real metric
11.0 card collapses into the command palette, query types
13.0 enter, toast slides up: the call to action
15.0 toast shrinks back to the dot, dot becomes the logo (= frame 0)
Every line needs an entry state, an exit state and a reason to exist. If you or Claude cannot say why a beat is there, cut it.
Step 4: the prompt itself
The prompts that people copied had the same sections, whatever the product. You can write your own in this shape; ours is a paraphrase of the pattern, not anyone's text.
- Inputs: what Claude should ask you for (product, URL, the one request a user types, screenshots, a track around 120 BPM, the logo), with defaults if you skip any.
- Direction: format and duration, the look (canvas colour, UI colour, one accent, fonts by name), the motion character (springs with a tiny overshoot, one camera move at a time), and a banned list (crossfades, blur-ins, glows, particles, holds over a second, anything that looks like a template).
- Structure: the BPM, the beat count and what happens on which beat.
- Build rules: every style computed from t, no CSS transitions or timers, the camera as one transform keyed on time, springs in closed form, shared elements for every handoff, motion blur by subframes.
- Gotchas: the failure modes you already know about.
- Start: ask for the inputs, then show the beat map and four stills before writing the full film.
Step 5: motion that has mass
Cheap motion slides from A to B on a fixed curve. Expensive motion accelerates, overshoots a hair and settles. Physics simulations would break the determinism of seek(t), so the creators above all use a closed-form spring: a formula that gives the position at any time without simulating the frames before it. When a value changes target several times, such as a container's width or the cursor position, you add one spring per change rather than restarting it, and the motion stays continuous.
Sketch: a value with several targets, still a pure function of t
// damped spring from 0 to 1, closed form
const spring = (tau, f = 3, z = 0.65) => {
  if (tau <= 0) return 0;
  const w = 2 * Math.PI * f, wd = w * Math.sqrt(1 - z * z);
  return 1 - Math.exp(-z * w * tau) *
    (Math.cos(wd * tau) + (z * w / wd) * Math.sin(wd * tau));
};

// width changes target at 1.0s, 3.5s and 5.0s
const changes = [[1.0, 320], [3.5, 96], [5.0, 900]];
const track = (t, base) => changes.reduce(
  (v, [t0, to], i) => v + (to - (i ? changes[i - 1][1] : base)) * spring(t - t0),
  base);

window.seek = (t) => {
  pill.style.width = track(t, 64) + "px";  // nothing else drives it
};
Give each kind of object its own feel. Small UI snaps with almost no overshoot, panels settle, the camera glides, headlines land hard and hold long enough to read. If everything bounces, nothing looks precise.
Step 6: put every change on a beat
Pick the track before you animate, not after. Have Claude analyse it with Python for tempo and beats, then find the drop by measuring energy in the bass band rather than trusting an automatic beat grid; Raphael Aubry found his detected bar was two beats off, which put his drop on nothing. Start the song so the drop lands on the key visual moment, put state changes on beats and big moments on downbeats, and place every sound effect by its measured peak rather than the start of the file.
We go deeper on this in our post on motion blur, beat sync and sound design for code-made video, including the subframe trick that gives these films their film-like motion blur.
Step 7: stills before renders, then a critic pass
Ask for four stills at the key moments before the full render. A still takes seconds to fix; a full render at eight subframes per frame can take a minute or more per second of film, by Raphael Aubry's own measurement. His stills caught a message going blurry during a send animation, a two minute fix that would otherwise have cost a full re-render.
After the full render, make Claude look at its own output as a critic, not as the author: a contact sheet at two frames per second, a strip of consecutive frames around the fastest move, and the frames scaled to phone width. Ask for scores on the hook, readability at phone size, motion, variety and sound sync, the three worst problems with timestamps, and a fix for each. Our post on the critic loop has the full checklist.
Step 8: direct like a director
The last twenty percent comes from notes, and the notes that work are concrete. "Make it better" gets random changes. "This part is too slow", "that fade looks cheap, make it change shape", "make the zoom hit on the drop", "slow every zoom to 0.7x" get exactly the change you asked for. Two or three rounds is typical in the published accounts.
Then export every format from the same timeline instead of cropping. Write scenes against a layout function rather than fixed pixels, and render 9:16, 1:1 and 16:9 separately, with bigger type and fewer elements in the vertical cut.
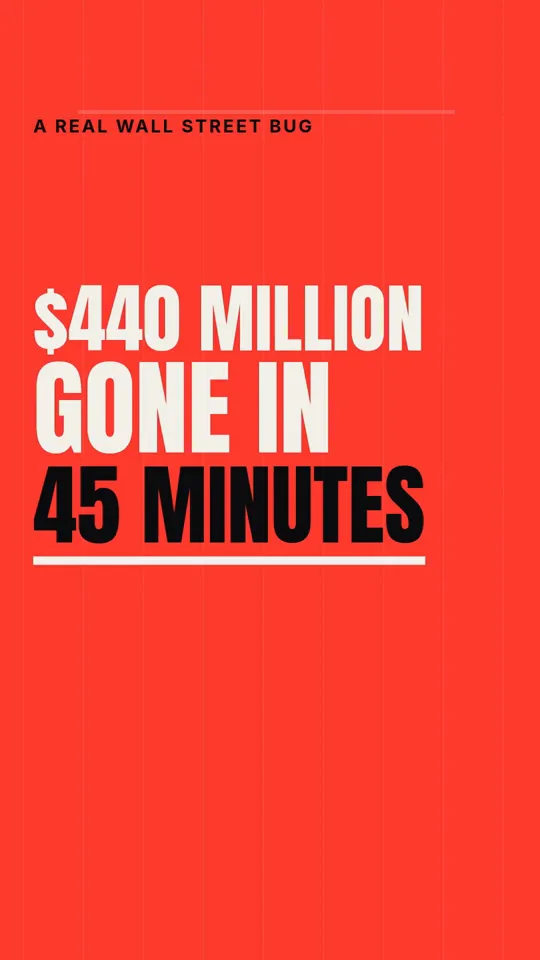
Kinetic type · 33 s
Kinetic type · 29 s
Pitfalls that cost the most time
- Trusting the one-prompt caption and quitting after the first render. Every honest account in this genre iterated.
- Letting the model draw your UI. Use real screens or nothing.
- Fading things in. In this style nothing fades; things change shape.
- Too few subframes on fast moves, which leaves ghost copies instead of blur.
- A colour flood that crosses the frame in one or two frames. Creators who measured it suggest about a third of a second and overscaling past the far corner, or it reads as a flash.
- will-change or similar compositing hints on anything the camera scales, which renders text blurry.
- A loop whose last frame does not exactly match the first, cursor position included, so it stutters.
- Captions or claims that are not true. "Made in ten minutes" invites people to check.
What it costs and how long it takes
The software is free: Chromium, Playwright, ffmpeg and Python, with free music and sound effects from libraries such as Mixkit. The cost is your Claude usage and your time. The published accounts range from under thirty minutes for a simple reel built from a site's real assets to several rounds over an afternoon for a film the author was proud of. Rendering is the slow part at high subframe counts, so run it in the background.
Our own measurements of what an agentic Claude Code session costs in tokens are in what a Claude video costs. Expect the first film to take the longest; the second reuses the renderer, the audio scripts and the review checklist, which is why several creators recommend keeping one session or one project folder per brand.
Doing it in about 3 minutes with WhatToUpload Video Studio
If you want a vertical video about a topic rather than a bespoke launch film for your app, Video Studio does the whole pipeline from one sentence: Claude writes the script and storyboard, our renderer draws every frame as code, ElevenLabs voices it, and captions, music and sound are timed for you. A video takes about three minutes.
Be clear about what it is today. The styles live now are Kinetic type, Ink stickman and Diagram explainer, with more being added. It does not yet capture your product's screens, so for a true UI launch film the method above is still the way. For explainers, announcements and topic videos that promote your product, Kinetic type is the closest fit.
A 30 second video is 26 to 30 credits, and plans are $19, $49 and $99 a month.
Sources and methodology
This tutorial is built from creators' published articles and threads on X, read in full in November 2026. Times, prices and view counts quoted from them are their own claims, linked so you can judge them. The method and code sketches are our own wording.
- 01zero (@twoclipping): How I Make $10K Launch Videos for $0 with Opus 5.5X Article, Sep 28, 2026. Three full prompts; studio price comparison is his framing.
- 02Raphael Aubry: i made 10+ motion videos with opus 5.5 in 3 daysX Article, Sep 28, 2026. Open source skill at github.com/howseen-ai/claude-motion-design.
- 03seeco (@seeconvm): What the viral one-prompt videos are hidingX Article, Oct 3, 2026. Relays Tony Dinh's and Rob Hallam's results.
- 04Movez (@0xMovez): How to build a motion design studio with Opus 5.5X Article, Sep 27, 2026. Brand template, reference method, Rexan Wong's workflow.
- 05Remotion launch post and prompt historyNineteen prompts behind the January 2026 launch animation.
- 06beamnxw: How i built a motion design studio my ai employee runsX Article, Oct 16, 2026 (paid partnership). On selling launch films: the business side.
Frequently asked questions
Can Claude make a product launch video by itself?
Claude writes the program that draws the video; a headless browser and ffmpeg turn it into an MP4. With Claude Code, which can run those tools and look at the frames it rendered, it can do the whole loop. It still needs your real assets, a plan and a few rounds of notes to look like a launch film rather than a template.
Do I need Remotion or HyperFrames?
No. Several creators found that Opus 5.5 prefers a single HTML file with a seek(t) function, captured with Playwright, even when a framework is installed. A framework helps if you want reusable components or a team workflow; say so explicitly in the prompt if you want one. See Claude vs Remotion vs HyperFrames.
How long should a launch film be?
The published examples cluster between 15 and 30 seconds. Fifteen seconds fits six to eight shots, which is enough for a hook, the problem, the product in action, one proof point and a close.
Why does my first render look like everyone else's?
Without a reference and a look spec, the model fills every blank with its safest default, which is where the centered gradient title comes from. Give it a reference film, real assets, named fonts and colours, and a banned list. Our post on writing a style bible covers this in depth.